Water-activated tape is specifically designed to adhere to fiber-based substrates such as paper and corrugated materials. It is not suitable for use on coated, plastic, or other synthetic surfaces, as it
will not adhere effectively to these materials.
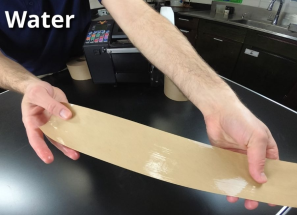
Key to Proper Activation: WATER
The adhesive side of the tape must be thoroughly wetted
with water. The water activates the starch-based adhesive, making it slippery and fluid upon application.
If the tape feels sticky right after applying water, it likely indicates insufficient water has been used. The tape should feel slick immediately after water is applied.
Ideal Water Temperature = 110°F
The recommended water temperature for activation is 110°F. While colder water can be used, it will slow down adhesive activation and extend the open time. Conversely, warmer water (above 110°F) will speed up activation, causing the adhesive to set more quickly. However, using warmer water is not advised in practice, as it can lead to excessive adhesive buildup on the brushes of tape machines, requiring more frequent cleaning or replacement.
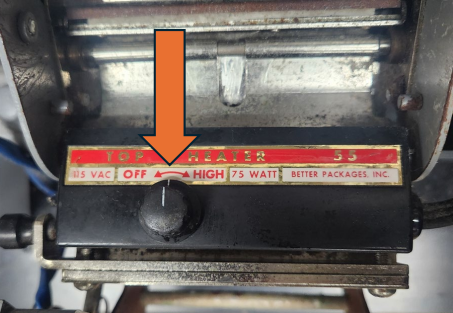
Most Common Mistake: Maxing Out the Brush Heater
At its maximum setting, a standard brush heater can reach temperatures of up to 165°F, which significantly
exceeds the recommended 110°F. Excessive heat
causes the starch-based adhesive to crystallize on the brush, resulting in poor water application and a
drastically reduced open time. This can impair tape
performance and compromise seal integrity. To avoid
this, set the brush heater to a moderate level. As a rule of thumb, if the brush heater is too hot to touch, it’s set too
high!
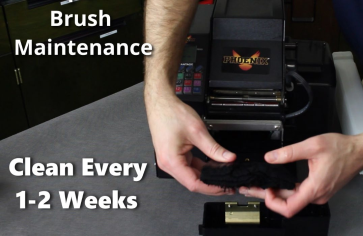
Brushes – Why they are so important?
Applying water to the tape works on the same principle as painting a wall in your home. Imagine trying to paint with a crusty, old brush—how would that turn out?
The same logic applies to the brush in a water activated tape dispenser. The condition and cleanliness of the brush are crucial for proper application.
A clean, well-maintained brush ensures an even and properly metered application of water to the tape. Poor brush condition and uneven water distribution are the most common issues when using water-activated tape. The good news? It’s an easy fix—just clean the brush!
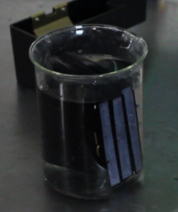
Soaking the brush in hot water for 10–15 minutes helps dissolve adhesive residue. Agitate the brush to flush out the build-up adhesive and rinse thoroughly.
Proper Dispensing
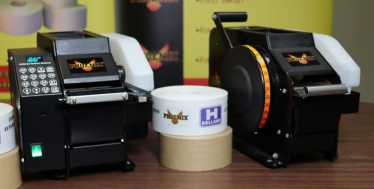
To ensure consistent application of water activated tape, a high-quality tape dispenser is essential. Holland recommends the Phoenix line of tape dispensers for their durable, metal sideframe construction and reliable performance. Both manual and electric models are available, but Holland advises using an electric dispenser equipped with a brush heater for optimal results.
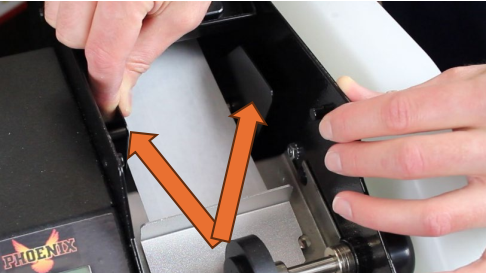
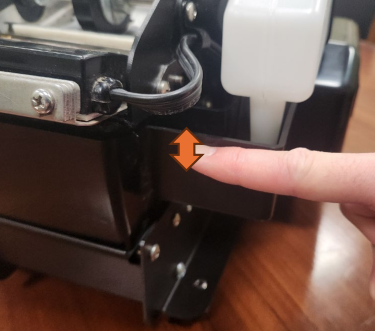
Ensure the tape is loaded correctly into the tape
dispenser. Most machines feature metal guides in the
tape carriage area, which play a crucial role in keeping the
tape aligned during dispensing. Proper alignment helps prevent jams and cutting issues. While the guides don’t
need to touch the tape, they should be positioned within
½ inch to effectively control the tape as it unwinds.
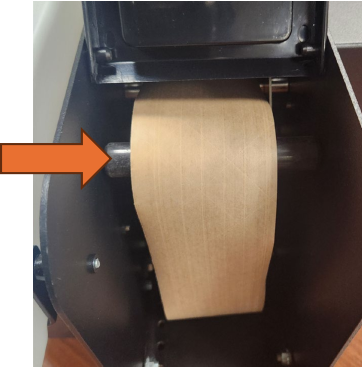
The tape path inside the tape machine is critical for proper dispensing. In most tape machines, there are rollers that guide the tape from the tape roll to the dispensing point. The tape must be threaded over the top of these rollers.
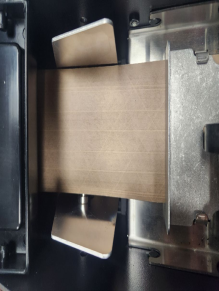
After threading the tape over the black roller at the back of the machine, guide it over the top of the second roller (metal roller) and then under the metal guide plate. Ensure the metal guide plate is securely positioned.
Pay attention to the metal side guides, which control the lateral movement of the tape roll. These guides are especially important when using larger rolls, such as 600’ or 1000’ rolls.
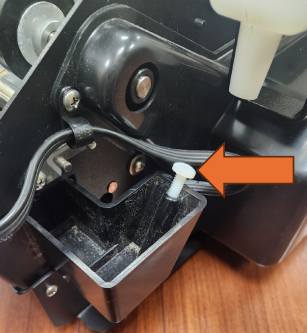
Setting the Correct Water Level
The proper water level is approximately ½” or 1 finger width from the top of the brush reservoir. This level of water will provide an accurate amount of water to the brush for application to the tape.
To adjust the water level, use the white plastic screw located at the water bottle’s interface with the brush reservoir. Turning the screw outward increases the water level by raising the height of the interface, while turning it inward lowers the water level.
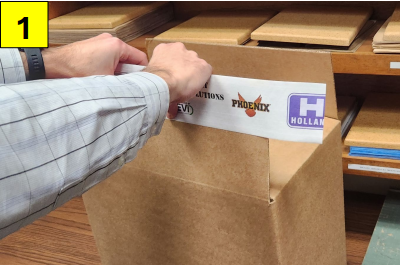
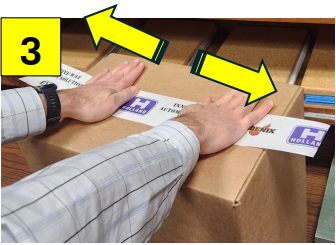
Applying the Tape to the Box
Once the tape is dispensed, the adhesive begins to set
within seconds. Promptly position the tape on the box
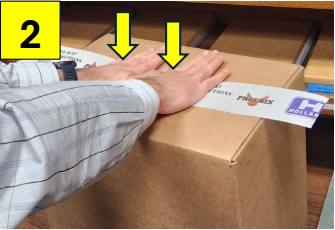
flap and close the box securely. Use your hands to sweep from the center of the box outward and down the sides of the minor panels.
Applying pressure is crucial as it helps embed the adhesive into the corrugated surface, enhancing the mechanical bond between the adhesive and the corrugated material.
Holland recommends a minimum 3” of tape length down the side of the minor panel of the box. Most water activated tape dispensers have inch length selections – select a length 6” longer than the major panel length and dispense.
Correct Length = BOX LENGTH + 6”
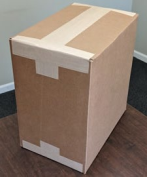
H-Seal for Additional Security
For heavy packages or when sealing the minor seam is necessary, the H-Seal
method provides enhanced security and durability.
After taping the major panel seam, dispense two additional lengths of tape and apply them along the minor panel seams. This method is highly effective for reinforcing and securing the box seams.
Troubleshooting Tips
Problem: Tape is not sticking
Is the adhesive fully activated and fluid across the tape’s entire width?
If not:
Check the water level in the reservoir.
Agitate the brush to ensure water reaches the tape effectively.
Clean or replace the machine brush if needed.
Ensure the brush heater is functioning properly and not obstructed. Obstructions reduce hold-down pressure at the water application interface, significantly decreasing water distribution.
2. Is the tape being applied to a corrugated or paper-based substrate?
Water-activated tape is designed exclusively for fiber-based surfaces. It will not adhere to non-fiber substrates.
3. What is the water temperature in the tape machine?
Replace the water in the reservoir with fresh water heated to the recommended 110°F for optimal adhesive activation.
4. Are you switching between tapes from different manufacturers?
Different manufacturers use unique adhesive formulations, and their chemistries may interfere with one another
When switching tape brands, completely replace the water in the reservoir and brush tray. Additionally, thoroughly clean the brushes to avoid cross-contamination.
Problem: Tape is jamming in the tape machine
Improper Control of Tape Unwinding
Ensure the tape guides at the rear of the tape machine are correctly positioned within ½ inch of the tape’s width.
Verify that the tape is following the proper web path as specified by the tape machine manufacturer.
2. Tape Not Cutting Cleanly
If the tape does not cut cleanly, inspect the shear blade. A worn blade may need to be replaced to restore proper cutting performance.
3. Tape Guide Plate Missing Before the Shear Cutter
Ensure the metal guide plate located before the shear cutter is installed correctly. This plate is essential for guiding the tape accurately through the cutting mechanism, preventing misalignment and ensuring clean cuts.
4. Obstruction in the Shear Cutter
Clean any debris or material stuck in the shear cutter. Use a puddy knife and keep hands clear of the shear when exercising to clear area.